
Pinky...A Story of a Table Remade
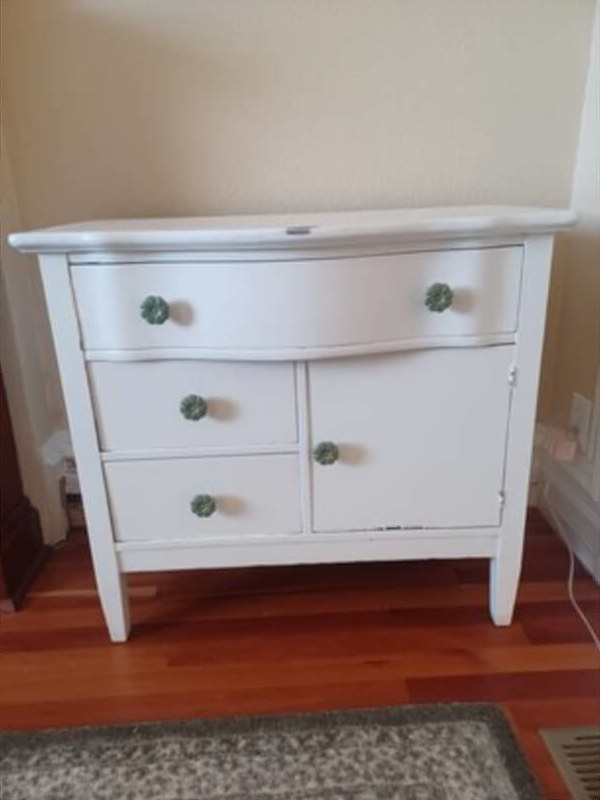
This darling dresser has a rich history adorned in various paint colors over the years. It has gracefully worn the coats of green, blue, and white, each reflecting a distinct chapter in its life. Yet, it yearned for another transformation to truly reveal its character.
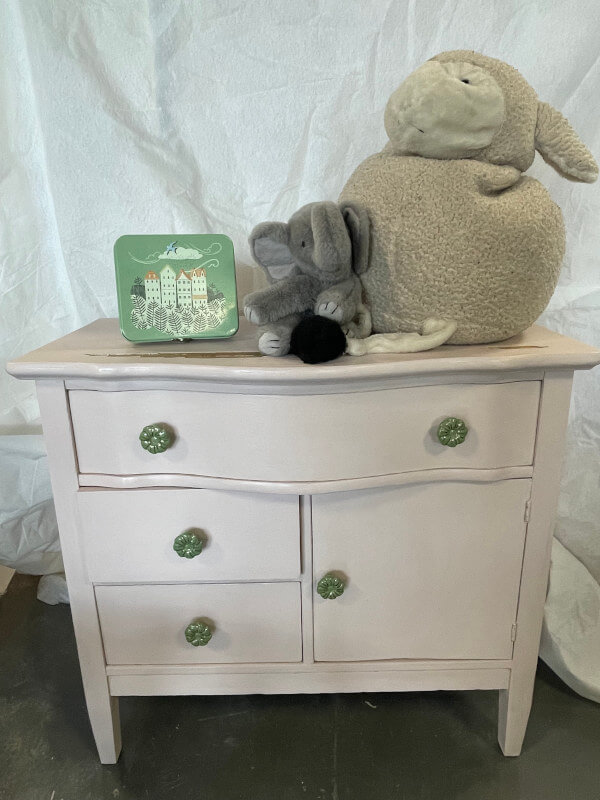
Those enchanting green flower knobs and the elegantly curved drawer seemed to whisper a passionate desire for a radiant PINK makeover. Could it be an homage to the iconic Barbie of 2023? I dare say, yes!
This piece seemed to be beckoning to a little girl’s room, where it would lovingly cradle crafting supplies, delicate doll clothes, cherished books, and treasured papers. Picture the dreams and creativity it could nurture in the heart of a young artist.
In Pinky’s story, we discover the magic of thrifting: history, transformation, and the promise of new beginnings. A testament to the enduring charm of vintage pieces, each with its own unique tale..
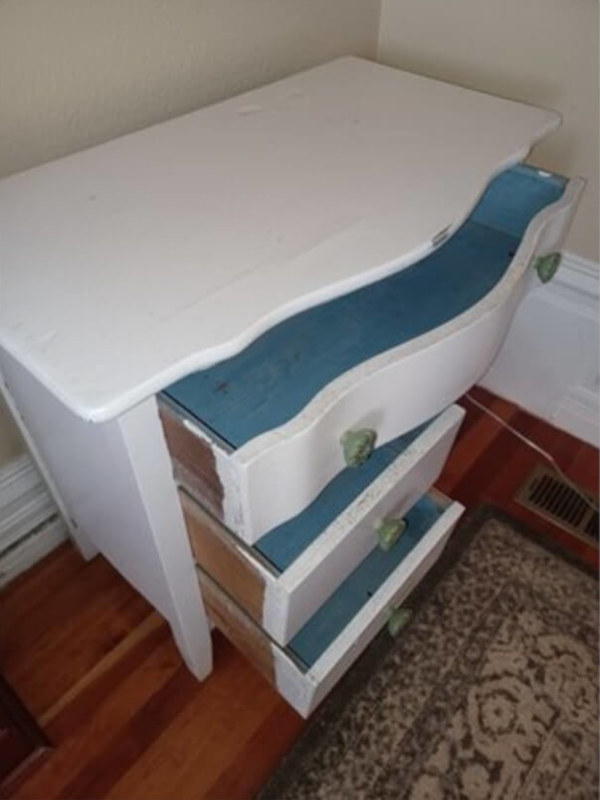
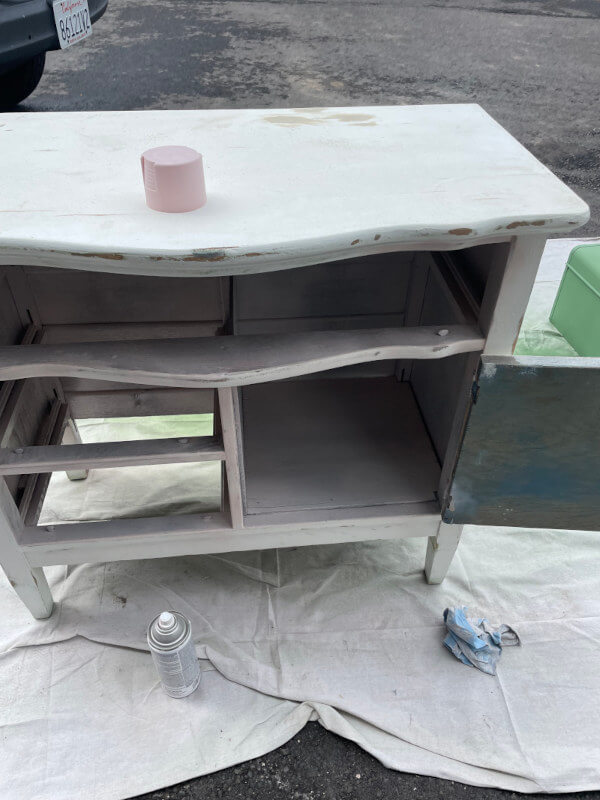
She looked like this when we first got her….
Preperation Time!
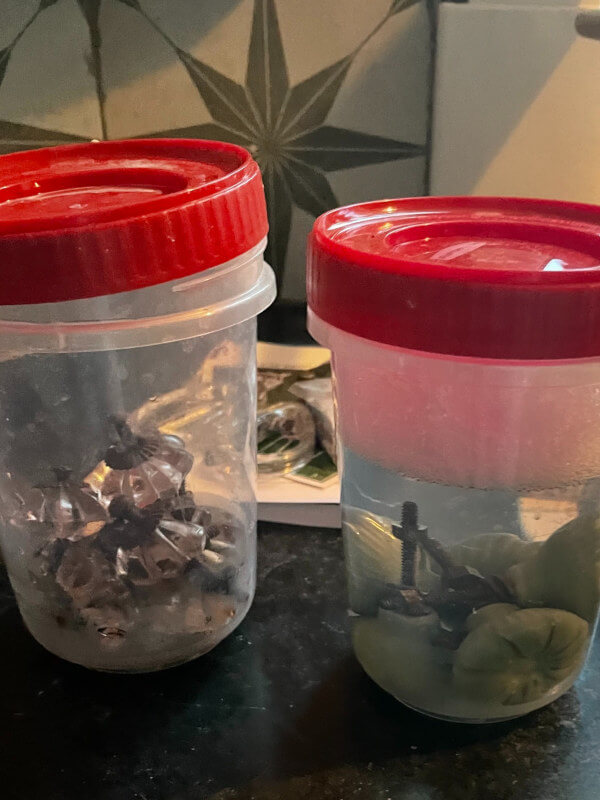
- Knobs Cleaning: The knobs were cleaned using Dawn Soap® and water. They were soaked and shaken in a container before rinsing and drying.
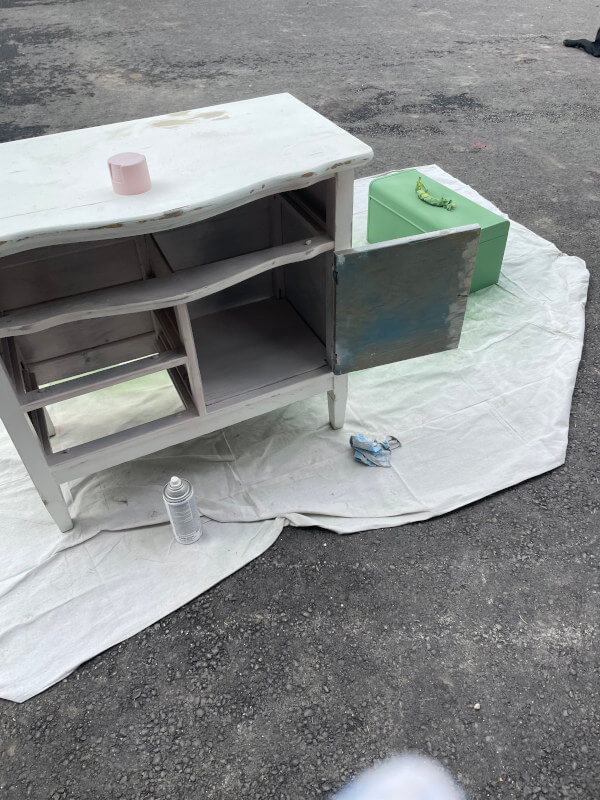
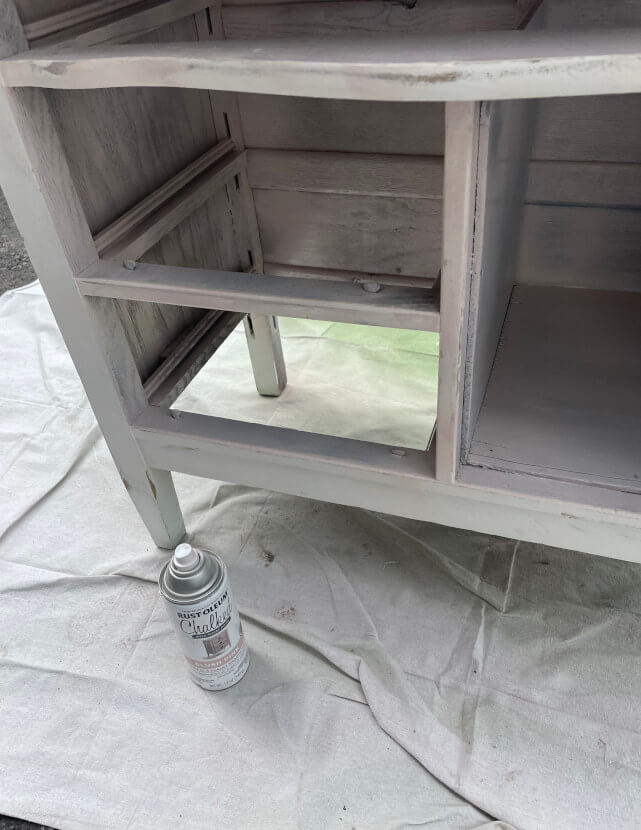
- Inside Treatment: The inside was sprayed with chalk paint for easier reach, especially on the backside, which wouldn’t be visible due to the drawers.
- Interior Cabinet: The cabinet’s inside, which would be seen, received a spray of chalk paint as a primer coat before painting with chalk paint.
- Exterior Touch-up: Minor wood filler was used on the exterior, followed by a light sanding to prepare it for painting.
- Painting: Annie Sloan Chalk Paint in Antoinette was applied for a sweet pink finish, requiring two coats with light sanding in between. Fusion Mineral Paint in Inglenook was used inside the drawers to complement the green knobs.
Blank
- Wax Application: Clear wax was used to protect the exterior paint. It was applied with a round brush and buffed after 24 hours using a crumpled paper bag.
- Shellac Protection: Given the expected wear and tear inside the drawers and cabinet, they were sprayed with shellac for added protection instead of wax.
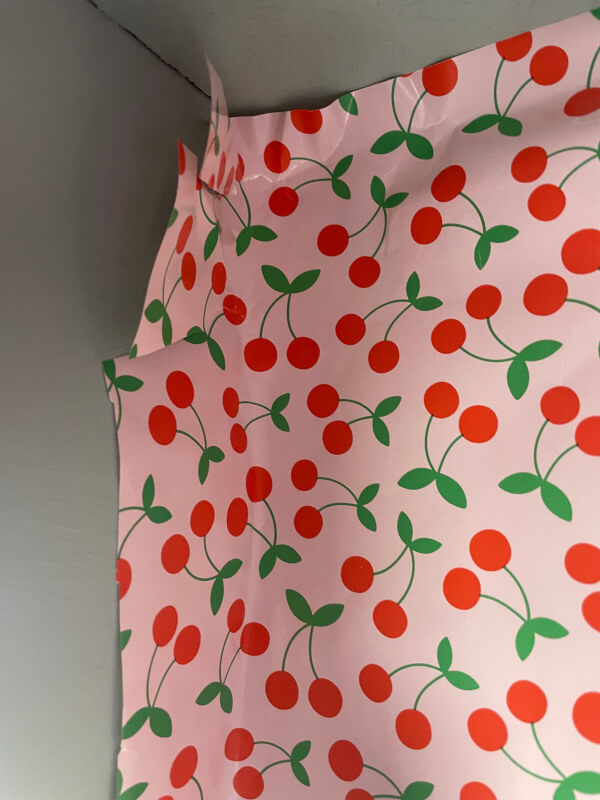
- Drawer Lining: A charming wrapping paper was used to line the drawers, adding a delightful touch that tied the color scheme together. It was also sprayed with shellac for protection.
- Completion: The piece was reassembled, creating a versatile bedside table or a lovely addition to a craft room.
Here She Is All Put Together!
- TSP Cleaner
- 120 grit sandpaper
- 400 grit sandpaper
- 60 grit sandpaper
- Wood filler/putty
- Dawn Soap® and a closable container
- Annie Sloan Chalk Paint in Antoinette®
- Fusion Mineral Paint in Inglenook®
- Chalk Spray Paint matching the desired color
- Clear finishing wax
- Wallpaper/Drawer Liner (optional)
- Shellac Spray
- Paper bag (like a lunch bag)
- Putty knife
- Desired paint and wax brushes
- Screwdriver (for removing knobs)
Process:
- Remove hardware and clean it in a Dawn Soap® and water solution.
- Clean the furniture piece with TSP or another cleaner and let it dry.
- Fill any imperfections with wood filler and sand with 120 grit if necessary.
- Spray the interior of the cabinet as a primer.
- Paint the exterior of the drawers and the interior of the cabinet first to allow them to dry.
- Paint the exterior of the cabinet.
- Paint the interior of the drawers.
- Sand with 400 grit before applying a second coat of paint. No sanding on the interior behind the drawers, but sand the interior sides of the cabinet.
- After complete drying, sand the exterior with 400 grit, clean away dust.
- Apply clear wax to the exterior of the piece and exterior of the drawers.
- Wait 24 hours and buff the waxed areas with a paper bag.
- Inspect for any areas that appear “dirty” after buffing. Sand these spots with 60 grit to remove the wax, repaint, and wax again.
- Line the drawers and the bottom of the cabinet.
- Spray shellac on the paper liners, as well as the interior sides of the drawers and the cabinet.
