
How to Line Drawers: No Modge Podge
I love lining drawers when I redo furniture. Why? Well, when you pull it open, there is a fun surprise inside. It can help reduce refinishing work and it adds a layer of creativity to attract potential buyers.
While there are various methods to embellish drawers, such as painting them in striking, contrasting colors or adorning them with captivating artwork, we’ve found a unique and less destructive approach to attach decorative paper that sets us apart. Our process is not only less messy and wasteful but also provides the flexibility to change the paper later if needed.
I read a lot of tutorials about using Modge Podge to line drawers when wanting to add paper. I tried it and I could not get it! I am sure it is an operator error. 🙂 But all I was able to accomplish was making a big mess, wasting paper, and ruining the bottoms of my drawers.
So I thought…if I had to remove the paper to fix my messes, which left paper marks on the paint job and caused me to scratch it up, then how would anyone be able to change out the paper if necessary?
So I decided to find a simpler, less destructive way to attach decorative paper that is less messy and less wasteful, moveable, and easy to remove later.
Using this adhesive spray allowed me to work with more forgiveness because you have time to reposition the paper. This is what I found at my local craft aisle.
The key to our success lies in the use of adhesive spray; a versatile and forgiving tool readily available in the craft aisle of your local store. Below is our step-by-step guide to achieving flawless drawer lining:

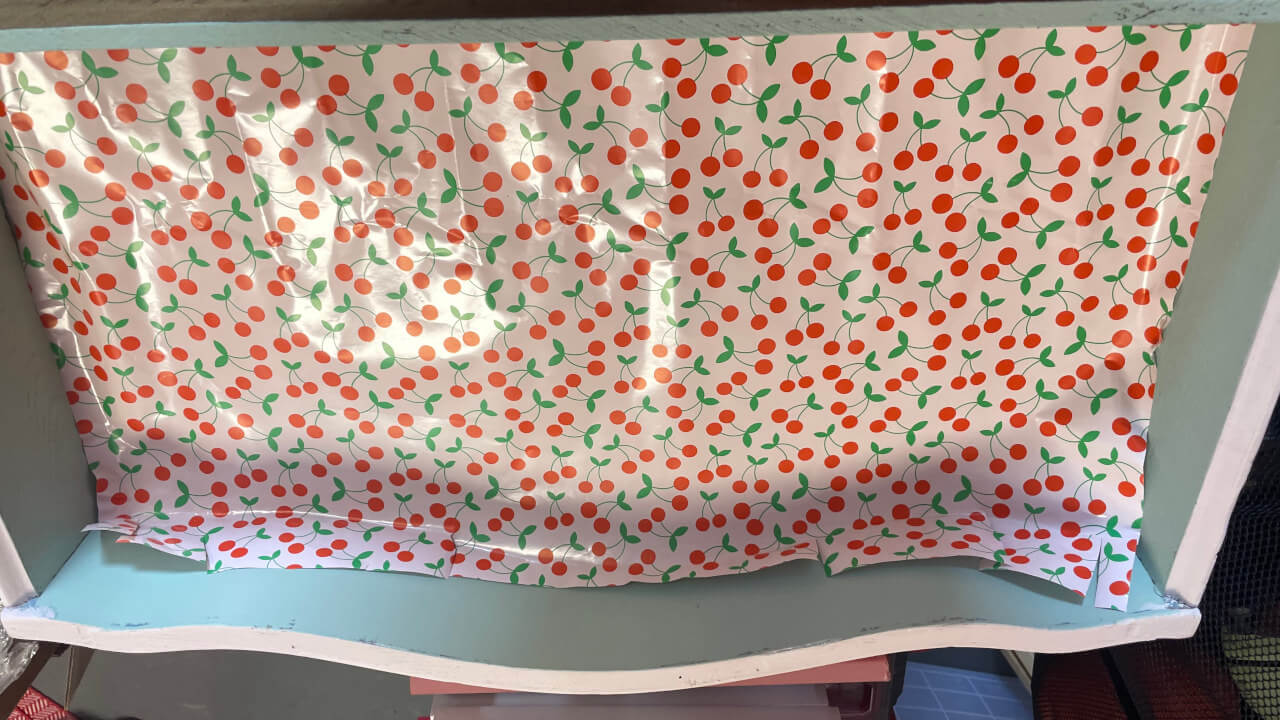
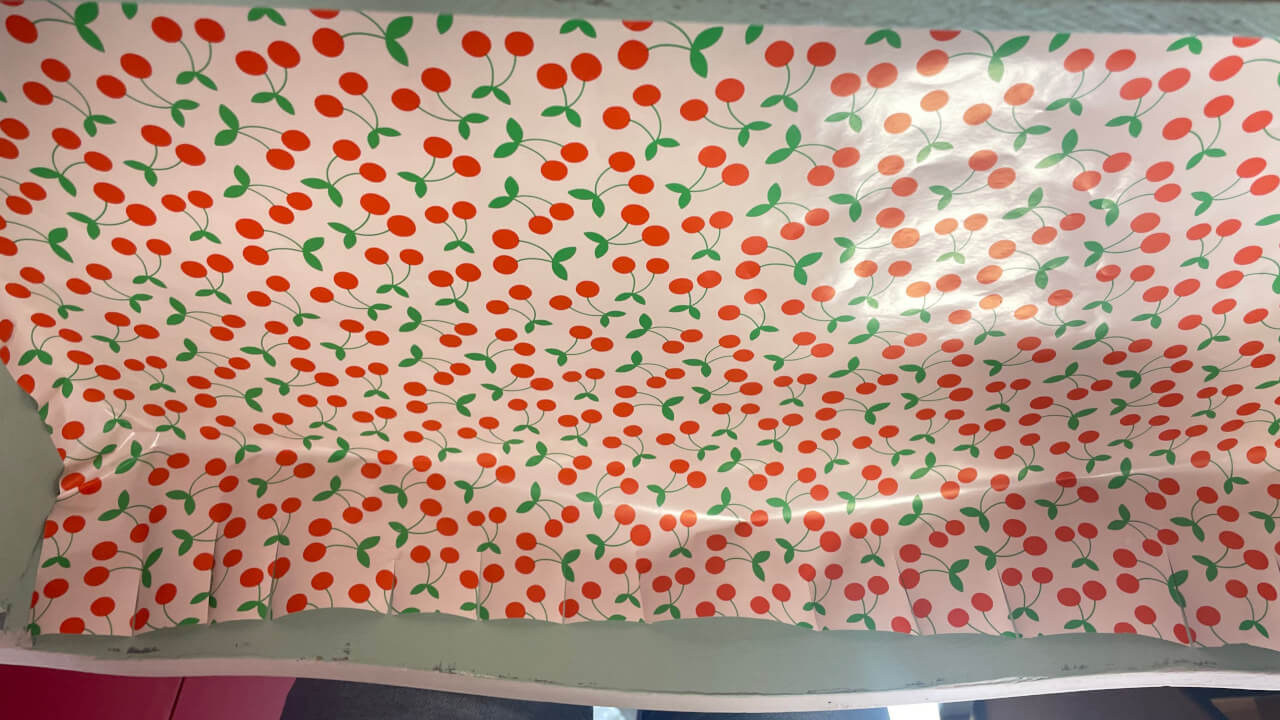
- Positioning: Begin by placing your chosen decorative paper into position without using any spray. This allows you to create the perfect alignment and fit for your paper. You can create “folds” to mold the paper to the drawer’s shape.
- Preparing the Mold: Carefully remove the paper “mold” you’ve created, keeping in mind how it will be placed back in. Move it to the side in the same direction to ensure a snug fit.
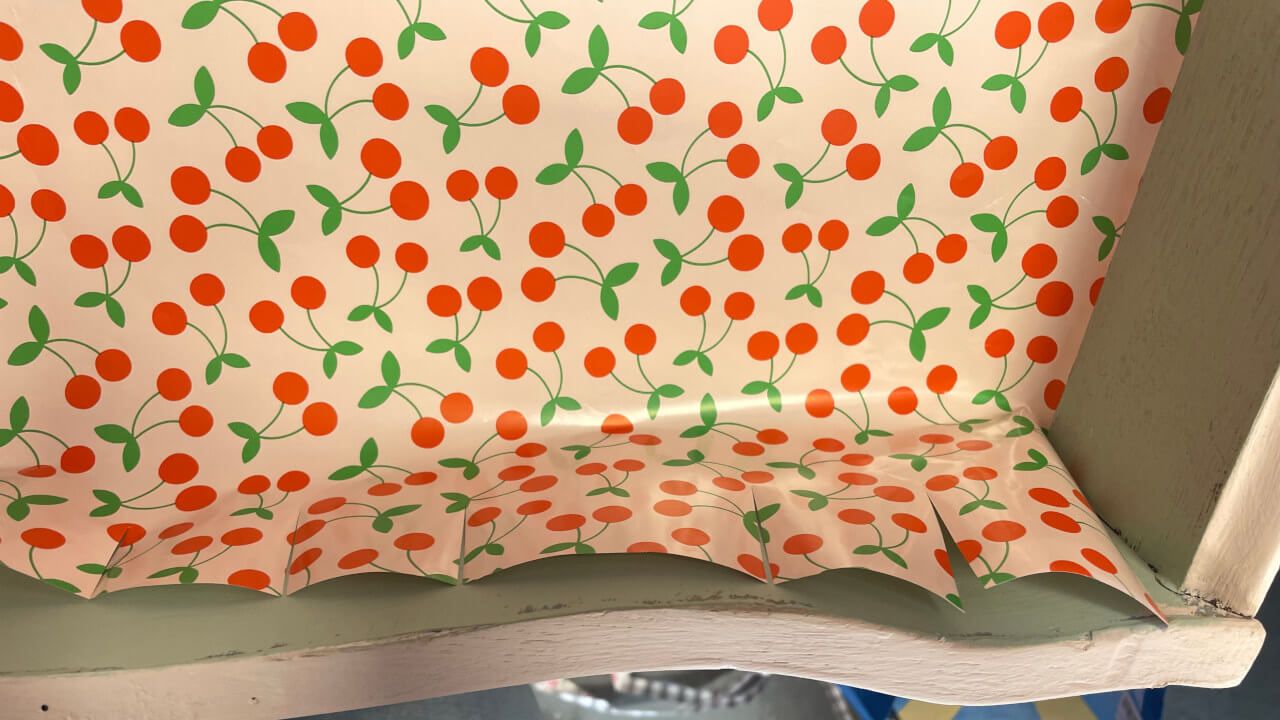
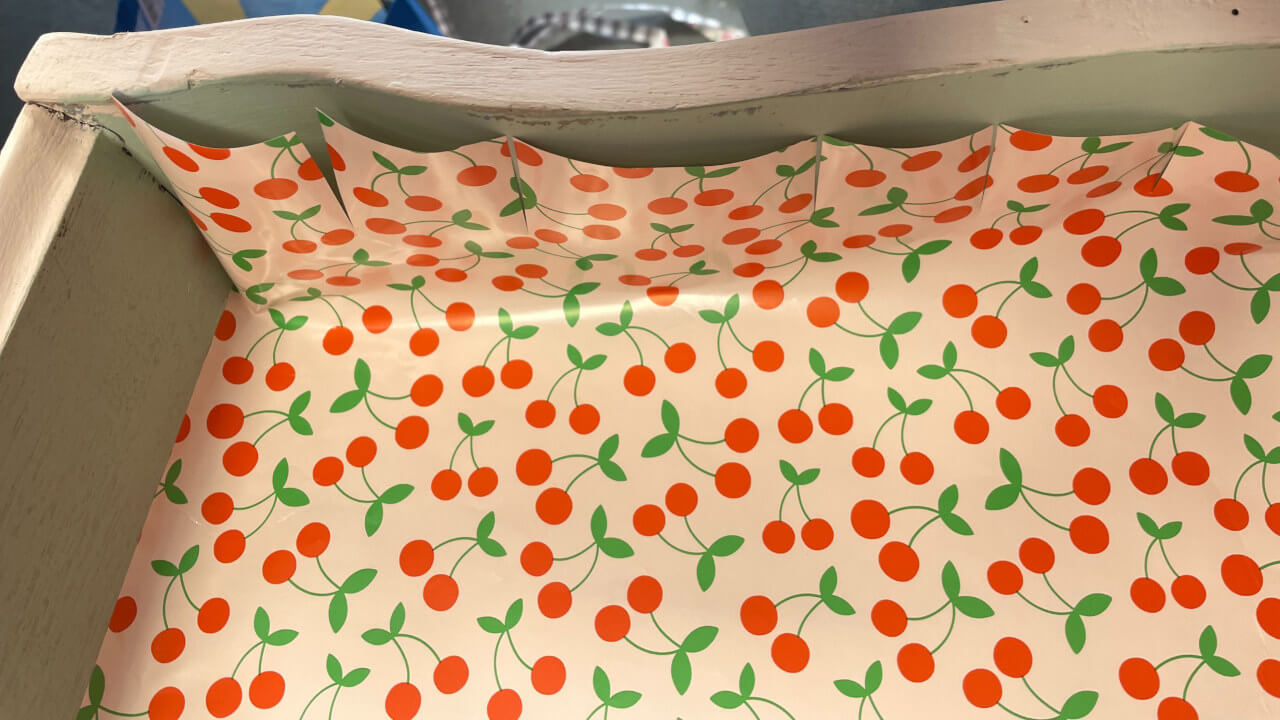
- Trimming the Excess: Carefully use a box cutter or scalpel to trim the excess paper. Start by cutting the corners to prevent tears, then trim along the sides, and smooth out the edges once again.
- Protective Shellac: Give your newly lined drawer a protective finish by spraying it with shellac. Remember not to brush it on, as it may smear. Spray from a distance of at least 8 inches, and do not touch until it’s dry. Apply a second coat from 6 inches away if necessary.
- Adhesive Application: Apply the adhesive spray to the bottom of the drawer.
- Molding the Paper: Gently place your paper “mold” back into the drawer, starting from the middle and smoothing it out towards the sides. You can go out to the top and bottom sides or the left and right sides, depending on your preference. Ensure a wrinkle-free fit.
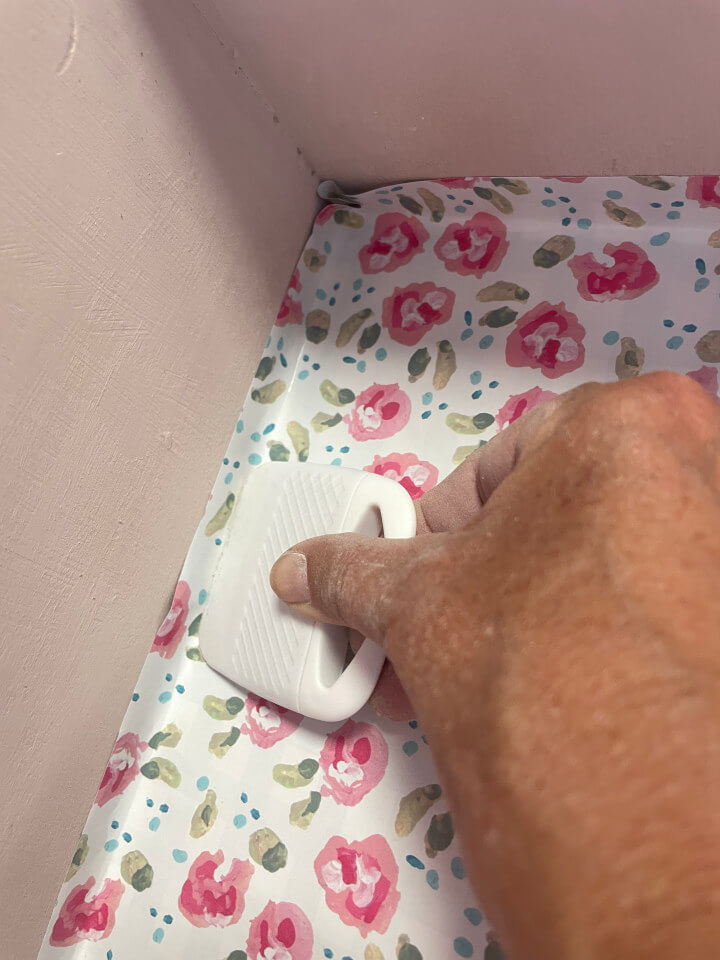
- Removing Bubbles: To eliminate any bubbles and sharpen creases and corners, use a tool designed for the purpose. We recommend a specialized tool or even a credit card. Be cautious not to tear the paper during this process.

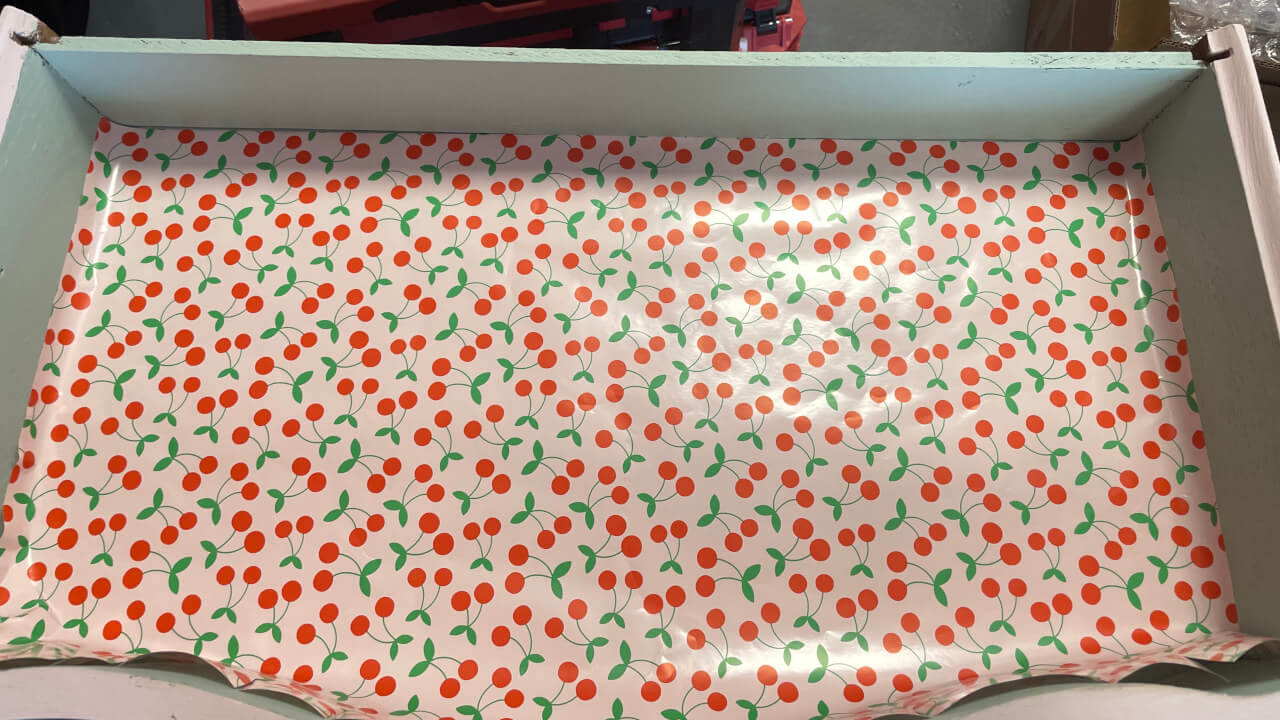
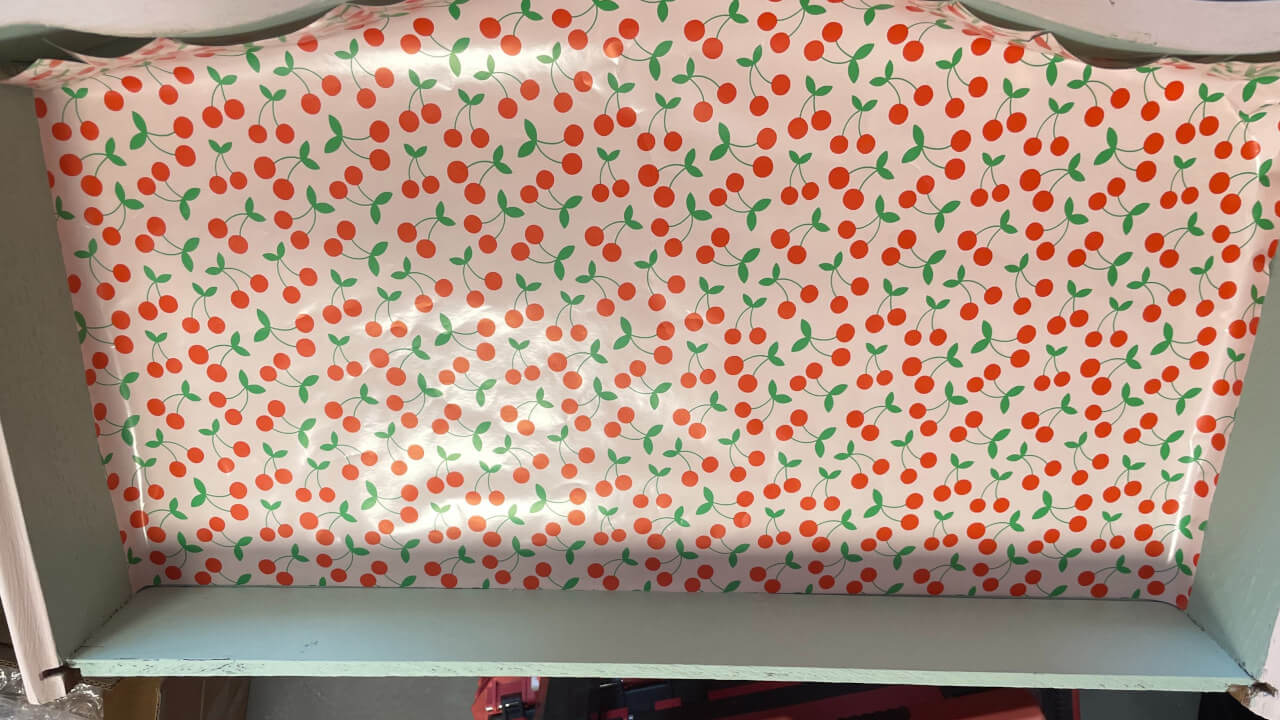
- Admire the Result: Voila! Your beautifully lined drawer is ready to charm anyone who opens it.
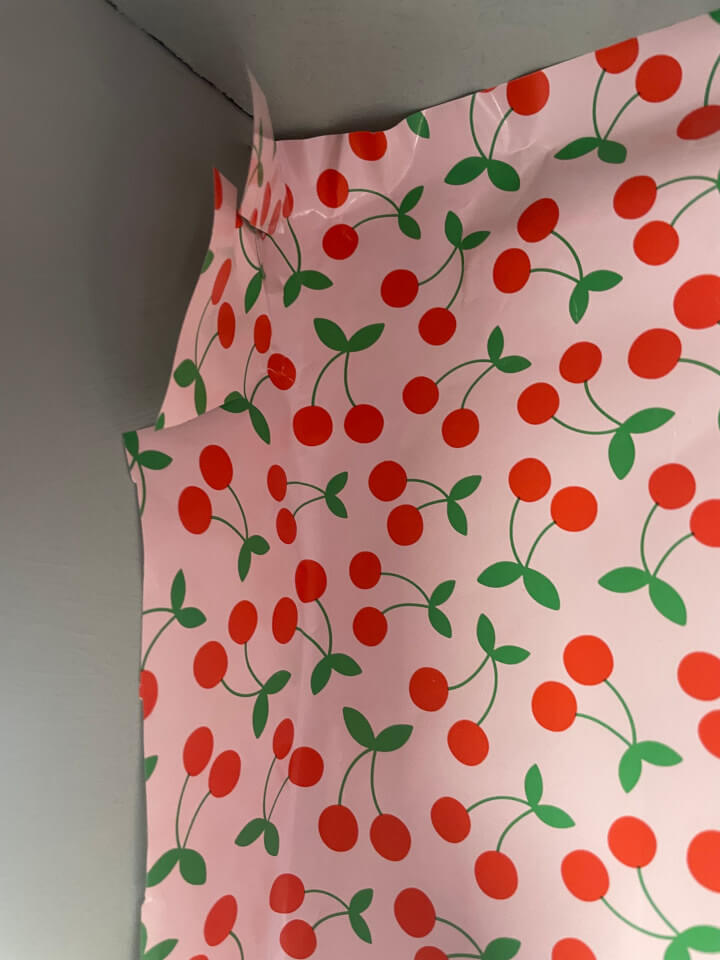
Note 1: If you accidentally tear the paper during the process, simply apply more adhesive spray to secure it back in place. The seams are usually inconspicuous.
Note 2: Be mindful that some sprays may smear the ink on the paper, potentially affecting the pattern. If preserving the paper’s integrity is essential, consider not using spray and inform your customers. They can choose to apply it themselves and take ownership of the outcome.
At Roots & Roost, Co., we take pride in our meticulous craftsmanship and attention to detail. Explore the world of exquisite furniture restoration with us and uncover the hidden beauty within each drawer.
The key to our success lies in the use of adhesive spray; a versatile and forgiving tool readily available in the craft aisle of your local store. Below is our step-by-step guide to achieving flawless drawer lining:
- Positioning: Begin by placing your chosen decorative paper into position without using any spray. This allows you to create the perfect alignment and fit for your paper. You can create “folds” to mold the paper to the drawer’s shape.
- Preparing the Mold: Carefully remove the paper “mold” you’ve created, keeping in mind how it will be placed back in. Move it to the side in the same direction to ensure a snug fit.
- Adhesive Application: Apply the adhesive spray to the bottom of the drawer.
- Molding the Paper: Gently place your paper “mold” back into the drawer, starting from the middle and smoothing it out towards the sides. You can go out to the top and bottom sides or the left and right sides, depending on your preference. Ensure a wrinkle-free fit.
- Removing Bubbles: To eliminate any bubbles and sharpen creases and corners, use a tool designed for the purpose. We recommend a specialized tool or even a credit card. Be cautious not to tear the paper during this process.
- Trimming the Excess: Carefully use a box cutter or scalpel to trim the excess paper. Start by cutting the corners to prevent tears, then trim along the sides, and smooth out the edges once again.
- Protective Shellac: Give your newly lined drawer a protective finish by spraying it with shellac. Remember not to brush it on, as it may smear. Spray from a distance of at least 8 inches, and do not touch until it’s dry. Apply a second coat from 6 inches away if necessary.
- Admire the Result: Voila! Your beautifully lined drawer is ready to charm anyone who opens it.
Note 1: If you accidentally tear the paper during the process, simply apply more adhesive spray to secure it back in place. The seams are usually inconspicuous.
Note 2: Be mindful that some sprays may smear the ink on the paper, potentially affecting the pattern. If preserving the paper’s integrity is essential, consider not using spray and inform your customers. They can choose to apply it themselves and take ownership of the outcome.
At Roots & Roost, Co., we take pride in our meticulous craftsmanship and attention to detail. Explore the world of exquisite furniture restoration with us and uncover the hidden beauty within each drawer.
Note 2: Be mindful that some sprays may smear the ink on the paper, potentially affecting the pattern. If preserving the paper’s integrity is essential, consider not using spray and inform your customers. They can choose to apply it themselves and take ownership of the outcome.
At Roots & Roost, Co., we take pride in our meticulous craftsmanship and attention to detail. Explore the world of exquisite furniture restoration with us and uncover the hidden beauty within each drawer.