
Old Glory - A Bench Gets a Place at the Party
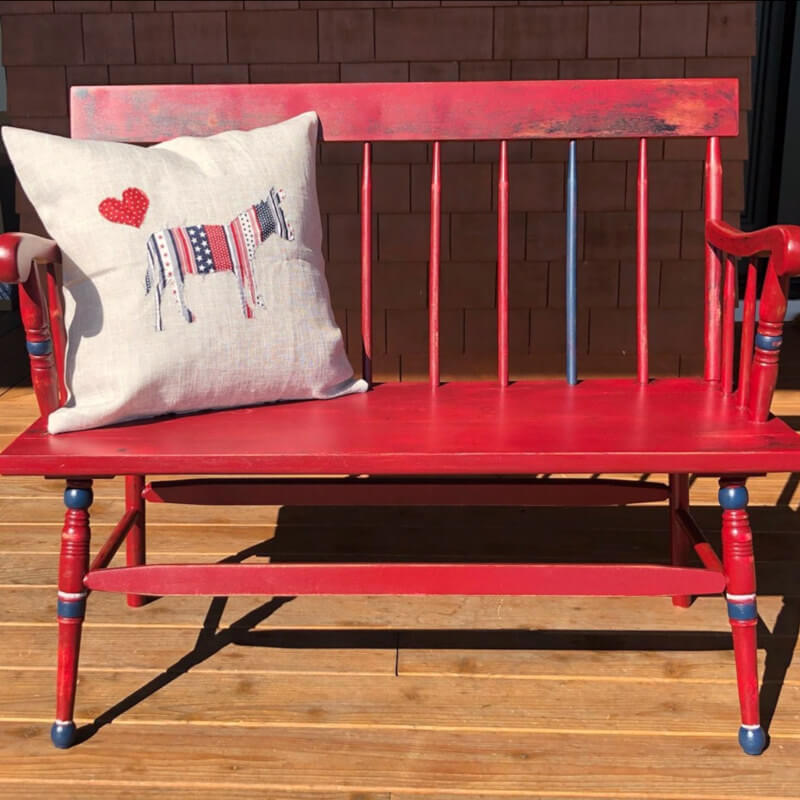
Step back in time with us to the 1950s or 60s, when this iconic American bench hails from the heart of Pennsylvania. Its original black finish adorned with delicate gold florals whispered tales of days gone by. Through years of dedicated service, it earned its stripes, quite literally, thanks to layers of outdoor red paint.
This bench has been a faithful companion, offering a weary soul a respite, a place to pause, and perhaps engage in heartfelt conversations. But as time marched on, it was clear that this cherished piece needed some TLC.
This bench has been a faithful companion, offering a weary soul a respite, a place to pause, and perhaps engage in heartfelt conversations. But as time marched on, it was clear that this cherished piece needed some TLC.
Restoring the Bench: A Labor of Love
To breathe new life into this vintage gem, the first order of business was sanding. Armed with grit ranging from 80 to 120, along with plenty of determination (and a dash of #girlpower), I painstakingly removed the flaking paint and addressed the loose bits of wood.
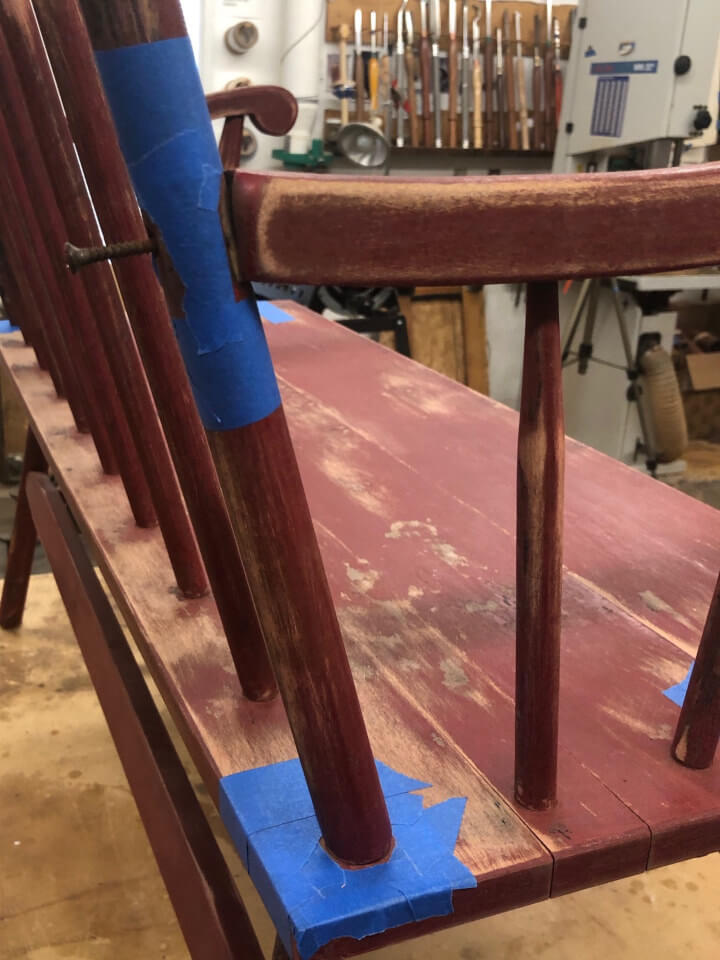
Given the bench’s age and its spindles’ loose disposition, I hesitated to resort to drilling or nailing for reinforcement. Enter my trusty ally: glue. This particular adhesive works wonders but demands precision. You must blend its components for approximately 40 seconds and then race against the clock, as you have a mere 5 minutes to apply it to the needy areas. A timer becomes your best friend in this endeavor!
To mix and apply the compound, I prefer using small acid brushes. They’re budget-friendly and easy to discard after use. And since I couldn’t locate my vise, I ingeniously turned to #100usesforbungeecords to secure the bench during the gluing process.
With painter’s tape, I marked off the specific areas on the bench that required the glue. This not only ensured precision within the 5-minute timeframe but also allowed me to gauge the required quantity. If the task seemed overwhelming, I planned to tackle it in manageable batches.

Painting with Precision
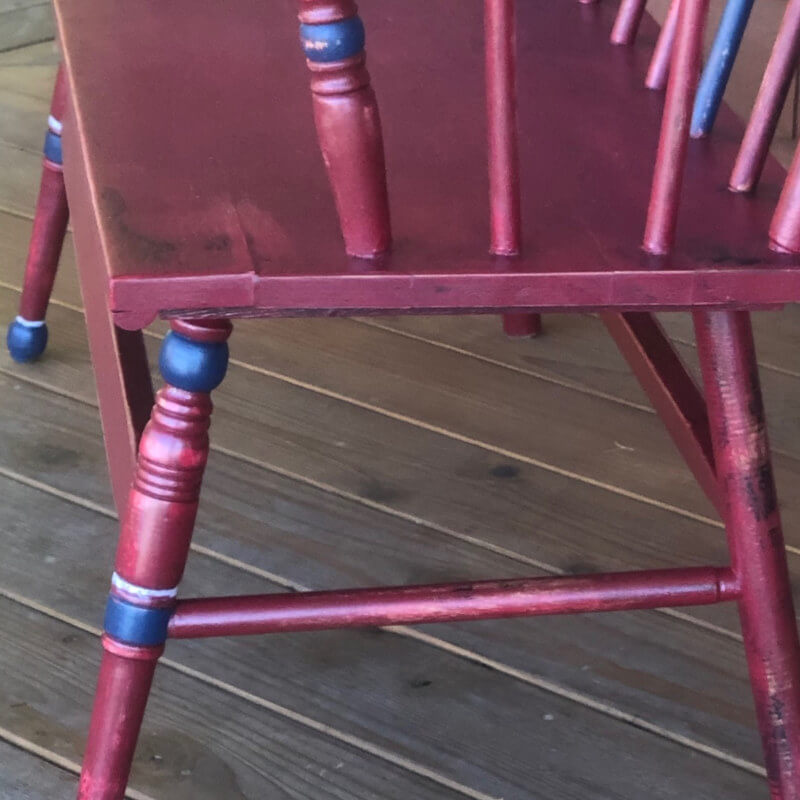
After the repairs were completed, it was time to infuse the bench with fresh color. Raiding my garage stash, I selected a vibrant “barn red” outdoor paint. I envisioned a predominantly red bench, adorned with tasteful hints of blue and white on the spindles and spherical leg accents. Painter’s tape, once again, was my artistic accomplice. I opted for thin tape from an auto paint store, which facilitated the creation of delicate lines and left no wood damage upon removal.
During this creative process, I was pleasantly surprised by the subtle “grey” hue revealed beneath the paint layers. A spontaneous decision led me to use light grey instead of white, sparing me from additional repainting.
During this creative process, I was pleasantly surprised by the subtle “grey” hue revealed beneath the paint layers. A spontaneous decision led me to use light grey instead of white, sparing me from additional repainting.
The Final Touches
As the paint dried, I introduced a touch of distress by gently sanding the bench with 220-grit sandpaper. Four coats of paint were meticulously applied, ensuring each layer dried thoroughly between applications.
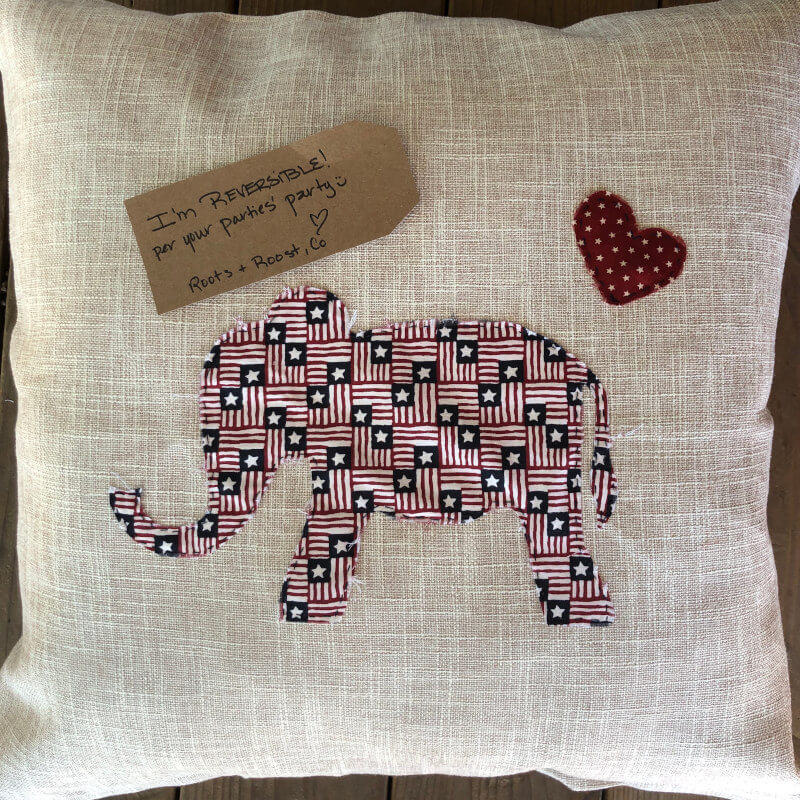
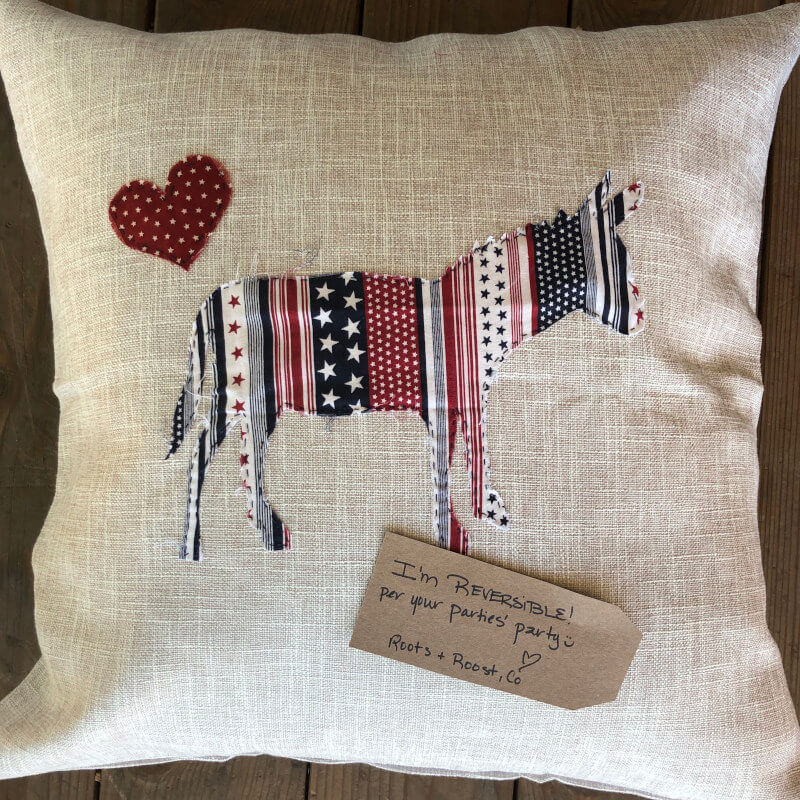
The result? A bench that beckons you to take a seat, offering both comfort and a patriotic charm that will elevate any home’s curb appeal. To add a touch of flair, a reversible pillow joins the party, ready to match your mood or occasion (#getoutthevote).
Or, in my household, it adapts to the whims of various family members who find solace on this timeless bench (#cantwealljustgetalong #godblessamerica).
Stay tuned for more insights into the products I’ve used in this journey, coming soon!